


How to Create a Slider for Images In Posts type

Table of Contents
New WordPress 5.8.2 media uploader is great and very useful for different things, not only for uploading images into posts. For example I use it very often for creating image sliders in posts. In this tutorial I will tell you how to do it in 4 easy steps.
So, how this slider works?
Very simple – all the images uploaded to the post (only uploaded, not directly inserted with <img> tag) will be used in a slider.

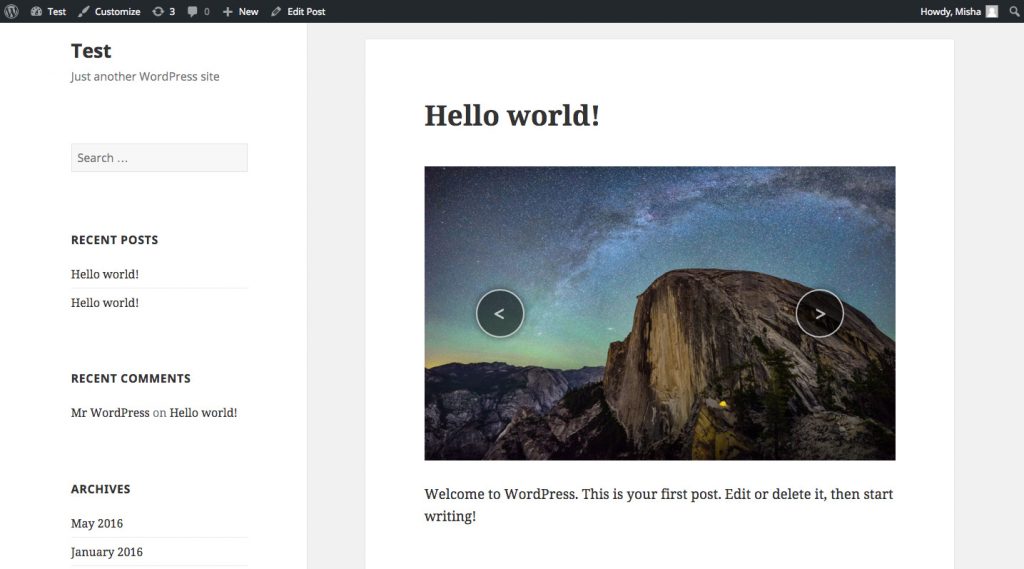
You can also use my tutorial when you need a slider on every product page on your website. Let me show the example of a slider from post images, created on my test website.
Actually we need only two files.
owl.carousel.css – CSS styles, the slider needs this file to be displayed correctly,owl.carousel.min.js – the jQuery plugin.
Step 1. CSS and JS
First of all be sure that your website header contains wp_head() function and your website footer contains wp_footer(). Without these functions the slider won’t start working.
Upload previously downloaded files owl.carousel.css and owl.carousel.min.js somewhere, I ‘ve uploaded them into my current theme directory.
After that insert this code into your functions.php file:
function rudr_css_and_js_for_slider() {
	wp_enqueue_style( 'owlslider', get_stylesheet_directory_uri() . '/owl.carousel.css', '', null );
	wp_enqueue_script( 'jquery' );
	wp_enqueue_script( 'owlsliderjs', get_stylesheet_directory_uri() . '/owl.carousel.min.js', array('jquery'), null, true );
}

add_action( 'wp_enqueue_scripts', 'rudr_css_and_js_for_slider' );
By the way, it is better to insert the owl.carousel.css content into your main css file (style.css file I think), after that remove or comment #2 line in the code above.
Step 2. Your Slider Width and Height
You should decide your slider images width and height, so it will look more consistent and beautiful. After that open your functions.php and add this line below:
add_image_size( 'my_slider', 640, 480, true ); // 640 - slider width, 480 - slider height
Then after uploading any image, WordPress will generate a copy with this width and height parameters just for the slider.
Step 3. The Slider HTML
Open a WordPress theme file where you want to display the slider. If you want to display it in posts, then open single.php
// array with parameters
$args = array(
	'post_parent' => $post->ID,
	'post_type' => 'attachment',
	'orderby' => 'menu_order', // you can also sort images by date or be name
	'order' => 'ASC',
	'numberposts' => 5, // number of images (slides)
	'post_mime_type' => 'image'
);
if ( $images = get_children( $args ) ) {
	// if there are no images in post, don't display anything
	echo '<ul id="slider">';
	foreach( $images as $image ) {
		echo '<li>' . wp_get_attachment_image( $image->ID, 'my_slider' ) . '</li>';
	}
	echo '</ul>';
}
Step 4. Activate the Slider
Finally, the last step. You should remember one important thing – insert the code below just before the closing </body> tag.
Besides, as this is the JavaScript code, you should place it between the <script> and </script> tags.
jQuery(function($){
	$('#slider').owlCarousel({
		items:1, // if you want a slider, not a carousel, specify "1" here
		loop:true,
		autoPlay:true,
		autoplayHoverPause:true, // if slider is autoplaying, pause on mouse hover
		autoplayTimeout:380,
		autoplaySpeed:800,
		navSpeed:500,
		dots:true, // dots navigation below the slider
		nav:true, // left and right navigation
		navText:['<','>']
	});
});
Full list of parameters you can find on the Owl Carousel documentation page.
That’s it. The slider is ready now but requires a little CSS customization.